Rain Catchment & Water Discipline (Urban & Field)
Objective
Rain catchment can provide a valuable emergency water source during blackouts, storms, camping trips, and service disruptions. The objective is to collect rainwater with a clean setup, treat it properly, store it safely, and stretch every liter with a disciplined usage plan.
Rainwater may look clean, but it can pick up contaminants from roofs, gutters, tarps, bird droppings, dust, smoke, leaves, insects, and storage containers. Collection is only the first step. Safe water planning also requires pre-filtering, treatment, container labeling, and strict separation between raw and treated water.
For broader water planning during disruptions, review Finding Water in a City During Emergencies and How to Purify Water in the Wild .
Scenario (Example)
Example: A 48–72 hour storm causes a city outage. Tap water is unreliable, stores are closed, and rain showers continue intermittently. You have rooftop access to a gutter, a balcony, trash bags, cord, a tarp, a few food-grade jugs, a pot, and basic water treatment supplies.
Your goal is to collect enough water for drinking, cooking, handwashing, and limited sanitation without contaminating your treated supply. You need a simple setup that can work overnight and a household plan that prevents waste.
Rainwater Safety Basics
Rainwater collected directly from the sky is usually cleaner than runoff from dirty surfaces, but it still should be treated before drinking in emergency conditions. Roofs and gutters are especially questionable because they collect dust, droppings, leaves, insects, roofing material residue, and pollution.
- Use the cleanest catchment surface available.
- Discard the first flush of rain from roofs and gutters.
- Pre-filter visible debris before treatment.
- Treat water before drinking, brushing teeth, rinsing food, or mixing drinks.
- Keep raw and treated containers separate.
- Use food-grade containers for drinking water whenever possible.
If you would not lick the collection surface, do not assume water running across it is ready to drink. Emergency water safety is not the place for optimism wearing a raincoat.
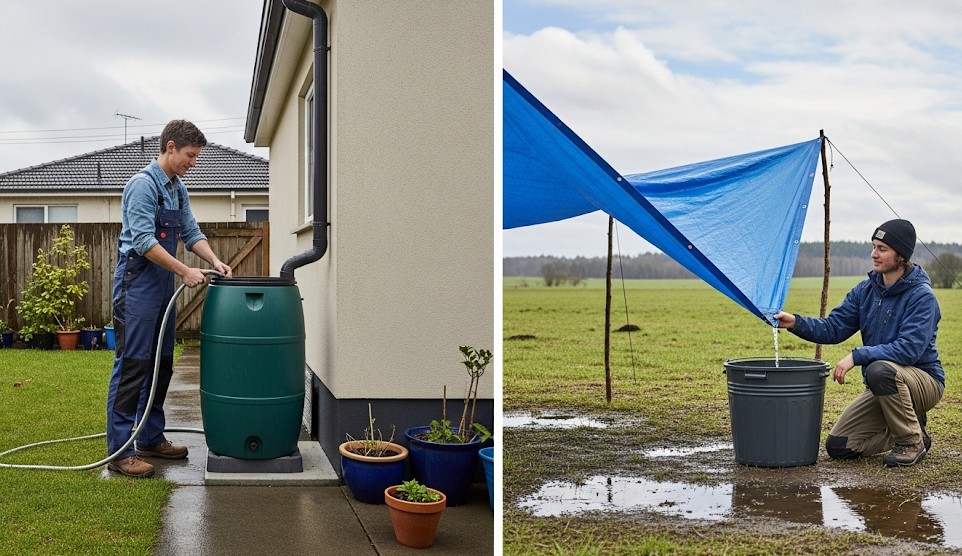
Catchment Options
- Gutter diverter: Line a clean tote with a new contractor bag, weight the corners with clean stones, and rig a cut-bottle spout to reduce splash. Discard the first flush before collecting for treatment.
- Tarp funnel: Tie a tarp to four points with a low center over a pot or jug. Keep the pitch steep enough to shed leaves and direct flow cleanly.
- Drip line: Tie clean rope or cord to a roof edge, tarp corner, or clean overhang so water follows the line into a container.
- Balcony catchment: Use a clean tarp, plastic sheet, or emergency blanket to funnel water into a covered container.
- Field catchment: Pitch a poncho, tarp, or plastic sheet between branches and direct runoff into a pot or bottle.
In the field, a tarp catchment can pair with shelter planning. For tarp and shelter positioning, see Building a Shelter from Natural Materials .
First Flush Rule
The first rain after a dry period often washes debris and contamination from roofs, gutters, tarps, and other surfaces. Let the first 10–15 minutes of runoff go to waste when collecting from roofs or dirty surfaces. After that initial rinse, begin collecting water for filtering and treatment.
For a small tarp that you know is clean, the first flush may be less severe, but rinsing is still wise if time and rain volume allow. If the surface has visible bird droppings, chemical residue, roofing tar, mold, or heavy debris, choose another catchment method if possible.
Pre-Filter & Treatment
- Discard the first flush from questionable surfaces.
- Strain water through clean cloth, coffee filter, bandana, or fine mesh to remove debris.
- Treat the water using boiling, chemical disinfectant, filter plus disinfection, or UV when appropriate.
- Treat bottle caps and threads, not just the water inside.
- Store treated water in a clean, sealed container marked clearly.
Pre-filtering makes water look better and can help treatment work more effectively, but it is not the same as disinfection. Clear water can still carry pathogens.
Boiling, Chemical, Filter, and UV Options
Different treatment methods have different strengths. Use what you have and understand its limits.
- Boiling: Reliable when fuel is available. Bring water to a rolling boil and let it cool in a clean covered container.
- Chemical treatment: Use the correct dose and contact time from the product instructions. Cold or cloudy water may require more time.
- Filters: Useful for removing particles and many biological threats, but not all filters remove viruses or chemicals.
- UV treatment: Works best with clear water and charged devices. Pre-filter cloudy water first.
For blackout cooking and fuel conservation during boiling, see Blackout Cooking with Common Household Items .
Water Discipline: 72-Hour Plan
Water discipline means assigning water by purpose instead of letting everyone use the cleanest water for everything. Separate drinking water from utility water and track usage.
- Plan roughly 2–3 liters per person per day for drinking, adjusting for heat, exertion, illness, and medical needs.
- Store “DRINK” water separately from “UTILITY” water.
- Use treated water for drinking, brushing teeth, food prep, and wound cleaning.
- Use raw or lesser-quality water only for appropriate non-food utility tasks.
- Use a slow-flow spigot jug over a basin for handwashing.
- Reuse grey water for toilet bucket cleaning only, not for food or drinking.
- Favor no-cook or low-cook meals to reduce water and fuel use.
For food planning that conserves water and fuel, see Food Without a Fridge: 72-Hour Menu .
Storage & Labeling
Confusion between raw and treated water can undo all your careful work. Label containers clearly and store them in separate areas when possible.
- Mark containers “RAW” or “TREATED” with date and time.
- Use opaque or shaded containers to reduce algae growth.
- Keep lids on containers to prevent insects, dust, and hand contamination.
- Do not dip dirty cups or hands into treated water.
- Pour treated water instead of scooping whenever possible.
- Clean and sanitize containers before reuse.
If using contractor bags or improvised liners, reserve those for collection or utility storage when possible. For drinking water, food-grade containers are preferred.
Urban vs. Field Considerations
Urban rain catchment has different risks than field catchment. Cities may have roofing materials, air pollution, road dust, bird activity, chemical residue, and questionable storage surfaces. Field catchment may involve tree debris, insects, animal droppings, and muddy splash contamination.
- Urban: Prioritize clean tarps, balcony funnels, and containers over dirty roofs when possible.
- Field: Keep catchment off the ground and away from animal trails or contaminated runoff.
- Both: Treat before drinking and keep containers clean.
Real Example
During a storm outage, two adults in an apartment used a tarp funnel on a balcony. They rinsed the tarp first, discarded early runoff, and then collected water into clean containers through a cloth pre-filter. Overnight, the setup collected about 18 liters. They labeled containers as raw or treated, boiled drinking water in batches, and reserved untreated water for flushing and cleaning tasks. That simple labeling step prevented accidental mixing and helped stretch the supply for two days.
Common Mistakes
- Drinking roof runoff without treatment.
- Skipping the first flush after dry weather.
- Mixing raw and treated water containers.
- Using dirty buckets for drinking water storage.
- Leaving containers uncovered.
- Using all clean water for washing dishes or hands.
- Forgetting to treat cap threads and pour surfaces.
Checklist
- Tarp, poncho, or clean plastic sheet
- Cordage or clips
- Food-grade jugs with caps
- Clean tote or bucket
- New contractor bags for liners
- Cloth, coffee filters, or mesh for pre-filtering
- Water filter, chemical treatment, UV device, or pot for boiling
- Permanent marker and tape for labels
- Slow-flow handwashing jug or spigot cap
Contingencies
- Dirty roof: Prioritize tarp funnels and free-hanging drip lines away from contaminated surfaces.
- Bird droppings season: Do not skip treatment. Boil or disinfect after filtering.
- No fuel for boiling: Use chemical treatment, filter plus disinfection, or stored safe water.
- No food-grade containers: Use improvised containers for utility water and reserve clean bottles for drinking water.
- Low rainfall: Reduce cooking water use, shift to no-cook meals, and ration treated water carefully.
After-Action
After the event or drill, record how much water each setup collected per hour of rain. Note which rig was easiest to deploy, which containers leaked, how much treatment capacity you used, and where labeling could be improved.
Rain catchment is simple in theory, but the details matter. Catch clean, discard the dirty first flush, filter debris, treat carefully, label everything, and protect treated water like the valuable resource it is. In a real outage, the household that knows where every liter goes is already ahead of the household arguing over who used the last clean jug to rinse a spoon.
← Previous | All Articles | Next →